![]()
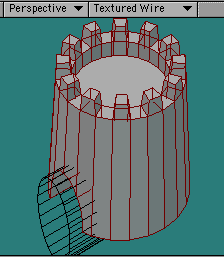
This is the third page of this tutorial. If you haven't finished the first or second page, please go back and do so now.
We'll be making the door in the Sandcastle using a Boolean operation. If you aren't familiar with them, booleans use one shape to modify another. There are several types, and they vary depending on the program you are using.
LightWave makes real booleans; that is, the geometry of the shape is actually altered, not just the rendering. This makes them very powerful, but also means that there's no easy way to change them once they are made, so it pays to be careful, or save the unaltered shapes in a Working file.
They are made by having the geometry in a Background Layer act on the geometry in a Foreground layer. So, in order to use one, we're going to have to open another layer.
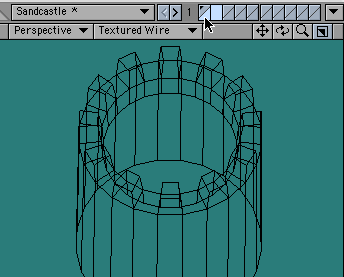
At the top right hand corner of the Modeler window, you'll see a row of rectangles with diagonal lines through them. The first one should be blue. Click on the second, and the first one will turn slate grey, while the second turns blue.
![]()
At the same time, your tower will seem to disappear. Don't panic! Those are your layer icons. Blue means the layer is in the Foreground. A black mark in the top left corner means that there is something on that layer. As you can see, the first layer still has something, but this one is empty.
Click on the bottom of that first layer icon, below the diagonal line. A black wireframe of your tower appears in all the viewports, and the bottom half of the layer icon turns blue. That shows it's being used as a background layer. This is handy for positioning objects, and necessary for some operations. (We'll get to that in a moment.)
We're going to make an arched door, so click on the Create tab, and get the Disc tool again. Working in the Back viewport, position the tool at the bottom of the tower, and drag out an oval, the shape and size you want for your doorway. (Any part that is below the tower will not affect the Boolean operation, so you don't need to worry about it.)
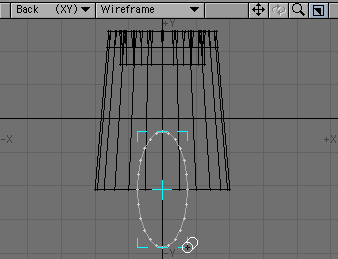
You can move it against the black outline of the tower by clicking and dragging the cyan cross in the center of the circle. Line it up so you are pleased with it.
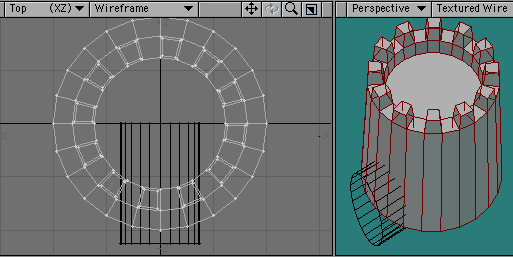
Then move to the Top viewport, and drag the middle of the line down, to pull it out into the third dimension. Position it so that the end you're dragging extends past the tower.
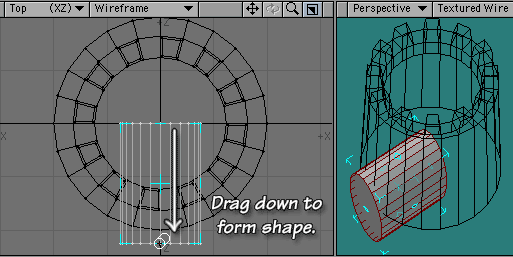
If you look at the Perspective view, you'll be able to see the forms interacting in 3D space. When you are happy with it, hit the spacebar to accept the shape, and drop the tool.
We are going to gouge a hole exactly the size of the new disc out of the tower, and there won't be any way to fix it (except undoing) if we don't like it. So make sure that it's as deep into the tower as you want it to be. (I'm making mine go halfway in, to make a nice dark doorway.)
Tap the ' (apostrophe) key (or go to View > Layers: Swap Layers or click on the first layer, and then on the bottom half of the second layer) to put the first layer in the foreground, and the second one in the background.
When you are ready, go to the Construct Tab.
![]()
Click on the Boolean tool button in the Combine section.

That will open the Boolean Panel that allows you to choose which of the four boolean types you want to create.

Since we want to "take away" the Doorway from the Tower, we need Subtract. Click on it, and then click OK.
