Note: I haven't used Bryce in years; so these tutorials are archived "as is." I can't accept questions, because I don't remember the answers.
This is page 2. If you haven't finished page 3, please do so before starting this page.
 The texture for the leaves, exactly like that for the trunk and branches, gives you three choices. Uniform, once again, places a single color on all the leaves, and is good for distant trees or quick renders to test leaf placement.
Image uses a picture as a texture, and Material allows you to use a material that you choose or make in the Material Lab.
You can also, and this is the fun one, make your own leaf shapes. Remember "User Leaf" in the Leaf Shape section? Go back there now, and choose it.
Now, go to the Material Lab. (Click Material, (which puts a green dot next to it showing you are using it,) and then click the Edit button next to it, exactly the way we did with the Trunk / Branch Texture.) Remember how we used a picture for the tennis ball in the pull toy? Well, we are going to do it again. This time, there is already a picture in the Component Palette. It's the default User Leaf. Click on the pinkish button to enter the Picture Editor, just as we have done before.
Click on the first empty square to the left of the pictures that are there, just like we did with the tennis ball. That will open a dialog that will allow you to browse your disk, and find a picture. Load the FanColor.jpg that you should have downloaded with this lesson.
It will appear in the large thumbnail on the left. Click on Load above the middle thumbnail, and load the FanTrans.jpg as the Alpha channel of the texture.
Notice that now you have an image of the fan on a checkered background in the thumbnail on the right, showing the transparency of this image. Transparency is driven by the Alpha channel. The darker the pixels there, the more transparent that part of the image. The lighter, the less transparent. Because the Alpha here is black and white, the black areas are completely transparent, and the white are completely opaque.
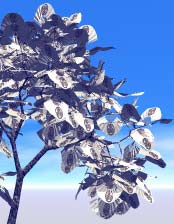
Hit the return key to close the editor, and hit it again to close the Material Lab. You are back in the tree lab. Render your tree, and you will see that the leaves are now all Japanese fans! You can make a money tree this way by scanning in a dollar bill, or a palm tree using your hand (sorry) or any other leaf shape you can imagine. All you need is the picture, and a mask for it to put in the Alpha channel, which you can make in any image editing program.
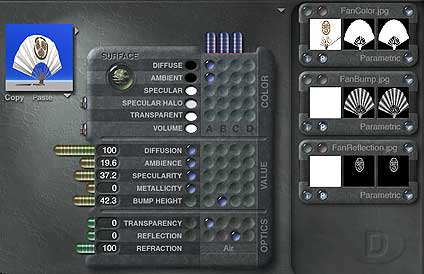 In the picture above, I also used pictures in the Bump and Reflection channel. They are in the download too, in case you want to do that. Call up a new component by clicking on the dimple in that channel, and then change it to a Picture by clicking the P on the palette, just as we have done before.
Anything that is not a color (everything in the Value and Optics sections) needs to be in the Alpha channel to work. Except for transparency and bump, which we have already covered, the brightness of the pixels corresponds exactly to the value of the slider, if you pulled it out. In other words, a pixel that is 100% white is like setting the value at 100%, one that is 30% white is like setting the slider at 30%, and so on. If you are using an Alpha channel to drive a value, the sliders will no longer work. So when you are making your own pictures for this, just set the value of the pixel where you want it to be; you can't fudge it when you get here. (Although you can invert it, by clicking on the half white/half black circle above the Alpha Channel thumbnail. Go ahead and try it out, if you want to.)
Distribution: 6 Compressed on the Y axis. |
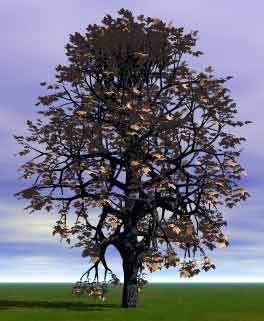 |
I'd like to give you a couple of tips to help you make realistic trees. If you want to make a specimen of an actual tree species, there is nothing like knowing what it really looks like. If you aren't lucky enough to have a yard full of trees, I strongly advise getting a field guide, Googling tree images, or checking a book out of a library long enough to make your own tree library.
If you are having a hard time getting the tree to look the way you want, try another tree shape. Don't be a slave to what is "supposed" to be the species. Experiment.
When you want a thicker, fuller tree don't add branches. Add segments. After all, branches can only branch where there is a segment.
If you want more limbs, or a larger spread on your tree, and you can't seem to manage it, make a little tree and stick it on the big one as a limb. This gives you more control. In the same vein, you can make trees with totally transparent trunks and branches, and put them in the same space as other trees to make the first tree look fuller.
Don't be afraid to resize your trees on the various axis. It works. The leaves and branches don't seem to smush. Also, whatever you do, make sure that your tree is actually in the ground. Put the center post of the wireframe on the land. Nothing screams "Bryce Tree" so much as a tree standing on its tiptoes, with the center of its trunk dangling in the air, supported only by its roots.
And remember; camera angle gives very important cues to the size of things. If you want your trees to look large, look up at them.
Alright. It's time to leave the Tree Lab for now. Have fun playing with the trees later.
 The next thing that we are going to explore in this lesson is Metaballs. Save your trees, if you want to, and open a new document.
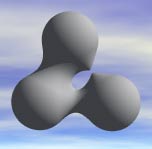
Metaballs are spheres that attract each other. The closer they are, the stronger the attraction between them. This attraction is shown by a band of material that flows seamlessly from one to the other. The closer they come to each other, the thicker the band grows.
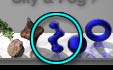 Lets take a look. Go to the Create palette, and click on the blue zigzag thing at the very beginning of the Primitives section. You have a single metaball.
Now click again, to get another. Zoom in, and make sure the Nano-Preview shows a nice close up of your metaballs. Now draw them apart, moving them only a bit at a time, and watch the result in the Nano-Preview. Pretty strange, huh?
Metaballs are used to make organic shapes.
They can be squashed and stretched, like any other Bryce object, so that you can make different shapes with them.
 |
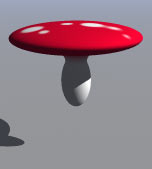 |
| Mushroom Wireframe | Mushroom Render |
Try this. Place one right above the other. (Line them up with the Align tool on the X and Z axis, select only one, hold down Option/Alt and drag to constrain the movement on the Y axis.)
Hold down Option/Alt to stretch from the center, grab the control handle in the middle of the X axis and pull it out to about twice its current width. Do the same with the control handle on the Z axis, to make a squished sphere. Keep an eye on the wireframe shadows to make sure it's somewhat symmetrical.
Then, select the other one, and move it down just a little using Option/Alt drag. Keep an eye on the Nano-Preview. Do you see it yet? You've made a mushroom!
 |
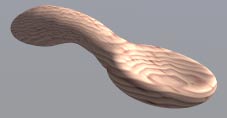 |
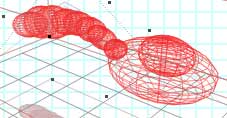
| Metaball Spoon Wireframe | Metaball Spoon Render |
Now lets make a simple wooden spoon. Make the larger sphere even larger, and squish it into a basic spoon shape. Make a curved handle by duplicating (Command/Ctrl-D,) shaping, rotating, and placing spheres until you have the basic shape. If the spheres overlap so that the edge of one is roughly at the center of the next, they will form a smoother line.
Hold down the Shift key, and click on the Metaball icon to create another metaball. Notice that it's invisible in the Nano-Preview, although you can see it perfectly well in the wireframe view. This is a negative metaball. Name it right away, because there is nothing obvious to distinguish it from the others in the Selection Palette. (I always name them Negaballs.)
Position it over the bowl of the spoon, and keep an eye on the Nano-Preview. See the hollow in the spoon? Use what you know about shaping objects to make the negative Metaball form just the shape you want for that hollow.
When you are finished, group the set, name it, and give it a nice wood material. (You can find several in the Simple & Fast Material Presets.)
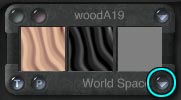 While you are in the Material Lab, look at the bottom right of the Component Palette. You will see text that says World Space. That's the mapping mode, remember? We used it to change the Tennis ball to Spherical mapping. Click on the flippy triangle and change the Mapping to Object Space. That will cause the texture to stay where it is on the spoon, even if you resize the spoon or move it around. (Don't forget that you know how to resize and move the texture to make it land just where you want it to on the spoon.)
If you leave the Mapping mode as World Space, the spoon will move through the texture, which invisibly permeates the Brycian World, and look different in different places.
Try it both ways, move the spoon and render, to see what I mean. (To get a good look, render the spoon, cycle through the display modes to mixed render and wireframe, and move the spoon until it's no longer overlapping the render at all. Then plop render just that portion of the screen. You will be able to see the two spoons side by side.)
Okay. Save this, because there is going to be an optional homework challenge, and open a new document.
 We are going to look at Symmetrical Lattices, or SymLats, next.
Go to the Create palette, and click on the thing next to the Metaballs that looks like a top. That's a Symmetrical Lattice. It's made by taking two identical terrains, clipping them, and sticking the bottoms together.
Way back in the early years of Bryce, it was about the only way to have complex objects, and it still works very well. Hit Command/Ctrl-E to enter the Terrain editor.
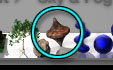
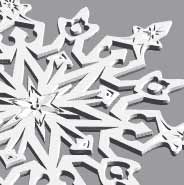
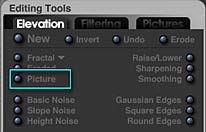 SymLats are made with pictures, and the larger the grid the better the final effect. So click on the grid on the Brush Palette, and choose 1024. Now click the Picture button on the Editing Tools Elevation palette, and find the Snowflake1.jpg, which you should have downloaded with this lesson. Click to open it, in the normal way.
The picture will appear on the Canvas, and the 3D Preview will show a very, very thick snowflake. Exit the Editor.
 Scale the snowflake on the Y axis, so that it's only as thick as a snowflake should be, make it white and render. Pretty neat, huh? A complex 3D shape as easily as that.
But wait, there's more. As you may have noticed, parts of the snowflake are floating in the air, and that's not what we really need. Let's make an icy clear center for those white parts to be crystallized on.
Duplicate your snowflake by hitting Command/Ctrl-D, and take the new one back into the Editor.
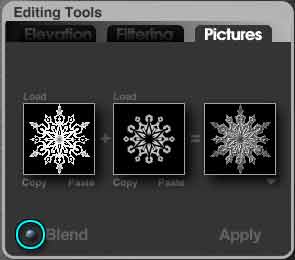 This time, Click the Pictures tab of the Editing Tools palette. You will see three thumbnails.
The one on the left should have the current terrain; in this case Snowflake one. The one in the middle is probably empty, but may have a terrain in it. The one on the far right is a blending of the two.
Load Snowflake2.jpg into the middle one. Now, if you wanted to, you could blend the two snowflakes. Drag right and left on the Blend button in the lower left corner to see how that would work.
But we don't want to blend this time, so drag all the way to the right. Click Apply, and you have a just the ice that we want for the snowflake. Since we want to put a transparent texture on it, go to the flippy triangle at the top right corner of the Canvas, and enable Solid. (This will make the Refraction value work properly.)
Leave the Terrain editor, go into the Material lab, and give the snowflake a nice icy texture. Remember to turn down the Diffusion and Ambience values, and give it a fair amount of transparency and a Refraction value of 130.5 (100 x the refraction value of ice, which is 1.305.)
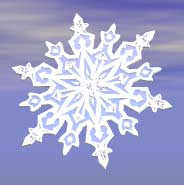 Do a test render, and you will see that the two of them fit together perfectly. Pretty cool, huh? Group and name them.
A few things to remember about SymLats. First, the higher the resolution, the smoother your finished piece will be.
Second, in your graphics program, make the design on a square with a flat black background. It's best if the square itself is the size that you intend to use for the resolution of your lattice. (If the design isn't square, Bryce will distort it, since all terrains are square.)
Keep the shading smooth. The smoother it is, the better the finished piece will be.
Keep everything that you want to show up in the finished lattice at least a few shades lighter than the flat black of the background. That black is the clipping plane. Anything as dark (low) as the plane will be clipped.
If you want to use Booleans on SymLats, remember to make them solid. If you don't, you are likely to find yourself with a shell, especially if you boolean two of them together.
If you want pieces to fit inside each other, like the two textures for this snowflake, duplicate the lattice and change the picture. It's not hard to make them separately, align them, and then group them; but this way is so elegant!
I make most of the designs I intend to use as SymLats in Illustrator, because it's easier for me to get the shading perfectly smooth there. Then I bring them into Photoshop for final working. But you can make the whole thing in Photoshop; just use the smooth tool a lot.
If you don't have any drawing programs at all, you can still make SymLats by drawing right on the Canvas in the Terrain editor. But it's a lot harder that way.
 |
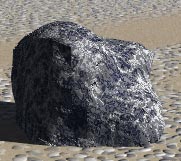 |
| Anti-Aliased Rock | Rock with no Anti-Aliasing |
Now, just to mention rocks, and finish up the Procedurals on the Create Palette. They work just as you expect. You click, you get one. If you don't like it, you delete it and click again.
You can add a material, just like you can for anything else.
You can also, and this is why I brought them up, keep them from anti-aliasing when you render, so you can retain that nice sharp grainy texture. To do it, open the Attributes (A in the Icon Column) hold down both Control/Ctrl and the Shift key, and click on the checkmark to close the Attributes. Now, when you render, that object will not be anti-aliased even though everything else will be. (It works for everything, by the way, not just rocks.)
To enable anti-aliasing again, open the Attributes, hold the Shift key, and click on the checkmark to close the dialog.
Your challenges, if you feel like doing them; make a bowl with a pear in it out of Metaballs to go with the spoon.
And, if you want a more difficult challenge, there is also a sword hilt in this download to use as a SymLat. Can you make the rest of the sword to go with it?