Lightwave UV Maps for UV Mapper Users - Lesson 5
This is the second page of the fifth lesson in this series. If you missed Page 1, you can find it here.
Once again, if you click on any of the pictures, you'll get a full size screen shot.
 |
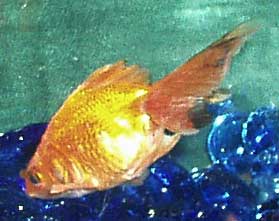
If you look at a goldfish, you will notice that the size of the scales changes at different parts on the body. We don't want to have to scale the scales, as it were, every time we make a texture for this little beastie; so we are going to do more work now to save tons of work later.
We are going to arrange the body on the map so that the checks follow the size differences of a goldfish's scales..
|
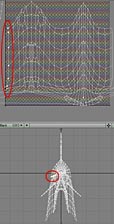 |
Begin by selecting the body, which should be simple because all the other parts have been cut and pasted.
We don't want the two halves to be completely symmetrical, because goldfish can have different markings on either side of their bodies. So we don't want Planar mapping this time.
Instead, we are going to map this using Cylindrical mapping, along the Z axis. That will give us a shape that needs as little tweaking as possible.
As always with Cylindrical mapping, we need to find out where Lightwave is splitting the polys, and put that split where we want it to be.
Select the points along the seam (on the left, this time,) just like we did for the Vambrace, memorize where it is, then undo, rotate in the Mapping morph, and Make UVs again.
|
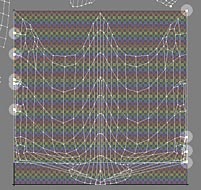 |
Before we can do manipulate this map at all, we have to unweld the polys along the seam. So, select them (they might be on either side, this time,) and Unweld.
Shrink the map in the V axis, so that the checkerboard squares on the sides of the fish look more like squares. It'll help if the map is closer to the way it should look. (It will also show you right away if there was a point you missed in the previous step.)
Now, we want to position the points, but we don't want to do more work than we have to. Ideally, we need to change both halves at once. But how can we do that when we've mapped cylindrically?
|
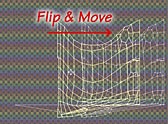 |
Simple. We just cut the map in half, flip one half, and put them on top of each other to adjust. We'll put them back when we are finished.
So, select one half of the body map, cut, and paste. Slide the left half over the right (or vice versa, if you prefer,) matching them up as well as you can, and we'll be able to manipulate the points as one. (It doesn't have to be perfect, but the closer it is, the less chance of error.)
|
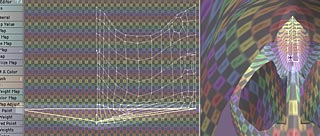 |
When you do this, you will notice that there is a poly that isn't selected, because it has one point at each extreme end of the map. That is one of two polys, right at the "vent" of the goldfish. We'll map them after we've finished the main part of the body; but for right now, lets hide them, along with the polys that are attached to them.
Select them, either on the model or the map, along with the adjacent polys that overlap the main body, and hide them, so they aren't in our way.
|
 |
Now, let's take a look at the map.
As you can see, the polys in the center section, where we want the scales to be large, are fairly large, while the ones in the tail area are pretty small. We need to reverse that, so there are small polys where we want large scales, and large ones where we want small scales. (Remember, the larger the poly, the more checks, or scales, will fit inside it, and vice versa.)
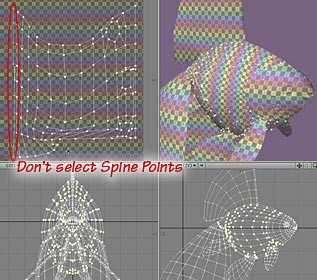
Because we used Cylindrical Mapping, the checkerboard squares are pretty evenly placed, and we don't want to mess that up too much. We also need to leave the points along the spine just where they are, so we can separate the two halves when we want to.
So, select all the points in this map, except the ones along the spine..
|
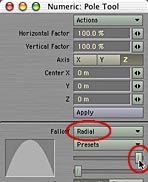 |
Go to Modify > Stretch > Pole 2 to use the Pole Tool. Open the Numeric Requester (n,) change the Falloff to Radial, and slide the top slider all the way to the right to change the shape of the falloff curve. |
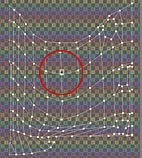 |
Place the tool on the map, where you want the largest scales to be, and slowly and carefully drag, paying attention to how the check pattern responds on the model. It's better to do several small adjustments than one large one, in my experience, moving the tool slightly between each one. |
 |
When the belly scales are large enough, you'll probably need to do some tweaking of the other parts to even it up.
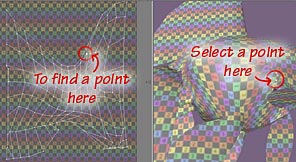
While you are doing this, use the colors and numbers on the checks to help you determine which points need pulling. If you still can't tell, don't hesitate to select a point at a "bad place" on the model, and see which one on the map "lights up" when you do.
|
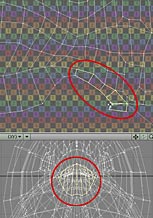 |
The secret is to take your time, and move in the smallest increments possible, (small steps, Ellie,) easing the checks into alignment.
Remember not to touch the points in the middle of the back. We'll need to flip this side back over, and we want them to match up.
When you are satisfied with it (or decide that you have spent enough time,) unhide the polys from the base near the tail, and drag the overlapping points so that they fit neatly along the bottom of the body map.
|
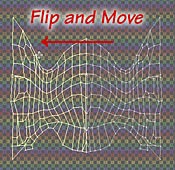 |
Scale the whole piece on the map, so that the size of the squares in the checkerboard pattern matches the pattern on the other pieces.
Then select the half with the reversed numbers, Flip UV Point Map, and drag it back into place on the left side of the map. Touch up the spine points, if necessary, and do whatever else you think it needs to clean it up.
|
 |
Remember, way back when, that I said that we'd get back to the head? Well, this is where we are going to do it.
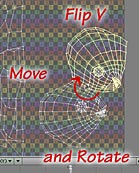
On the Model, Select the half of the head with the reversed numbers. On the map, slide it away from the other half, and Flip UV Point Map. This time, however, flip on V.
Then, put the two halves together, and rotate the top half, so they meet at the forehead. That will allow you to easily use a photo for the head texture, and still add a marking that matches over the top of the head.
|
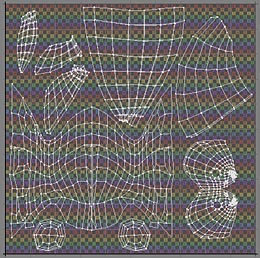 |
Now we have to fit all these pieces on the map, so that they leave as little white space as possible. (Which means that you have the maximum area for painting, of course.) Don't be afraid to flip or rotate to get the best possible configuration. However, don't resize anything just yet. Keep it more or less square, because that's the shape of the map.
When you think you've got it, select everything and Size to fit. (Don't use the Stretch tool; you want to keep the proportions just the way they are.)
If you have room on your map, you might want to make separate maps for the eyes, so you can have them larger than the head. You don't need my help for that, so I'll leave you to do it if you want to.
And that's it!
Delete any endomorphs, merge points, and you are ready to take the map into a graphics program and paint it.
|
 |
Of course, this isn't the only way to map this model. You might want to use a Cylindrical map on the head, or map the body the way we did the head this time, so you can use a photo as texture.
We did it this way so I could show you a couple more things, and so you could get used to the idea that you can use virtually any of the modify tools right in the map.
It's all flexible, and it's all up to you.
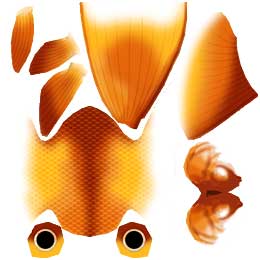
(By the way, in case you are interested, this is how the finished map looks, with a painted texture applied to it. This is the one I used for the render that starts this lesson, of course.)
|
And that's it. I hope you enjoyed these lessons, and I hope that you learned something you can use.
There are a lot of other tutorials out there that address this same topic. I suggest that you view as many as you can. Your own technique will probably be a mixture of things you have learned from many sources, and things that you have discovered for yourself.
Do explore the Mapping tools that we didn't touch on. There's a lot there! You can also find a ton of plug-ins and L-scripts that I didn't use, because you might not have them. Check some out at http://www.flay.com in the Plug Ins section.
Above all, remember to have fun!
If you have a question, write to me and ask it!
Everything on this site is copyright © Robin Wood; all rights reserved. Please do not use anything without permission. To get permission, write to Robin, and explain what you intend to use it for.
