Making Eyes (and other stuff) Glow in Poser.

Vampire Vickie, with glowing red eyes.
First pose the figure and all of that, just as usual.

The Glowing Eyes effect is achieved in the Materials Dialog, under the Render menu. Choose Render, then Materials... to open it.

Surface Material Dialog, Pupil material.
There is an Object popup menu at the top of this dialog box, in the far left corner. Hold down the popup, and make sure that the figure (or prop) you want to modify is showing. In this case, it's Figure 1. Since it's the only figure in this scene, I didn't bother to name it.

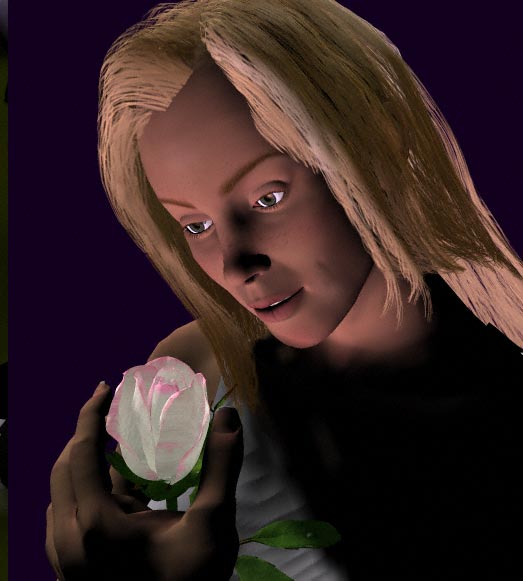
Now, to the right of that is another popup menu, which lists all the Materials that are available in that figure or prop. What is there depends on how the model has been set up by the person who made it. (It can be changed with UV Mapper, but that is grist for another tutorial. If you are interested in learning that, please go to the item titled Steve Cox's UV Mapper in the frame to the left of this one. If you aren't getting any frames, please click here.)

Anything that is listed there can be made to glow.

In this case, I am using Zygote's Victoria model. She has lots of different materials, including pupils, irises, and eyewhites. I'm going to make each of them glow with a different luminosity, to really make the illustration as spooky as I can.

Let's start with the pupils.

In order for them to really glow, we need to eliminate the Texture Map. Otherwise, there will be a black texture there, and a limit to how bright they can get. So go to the Texture Map dialog, and click on the popup menu to reveal your choices. Choose "No Texture."

Now set the colors in the Object Color, Highlight Color and Ambient Color boxes at the top of the dialog box. Click on the color in the box to bring up the color picker for your system.

I first set the Object Color to 358°, with a saturation value of 100% and a Lightness of 57%. That gives me a strong, bright red. Next, I clicked on the Ambient Color sample, and when the color picker appeared I held down the option/alt key. This gave me an eyedropper that I can then use to pick up a one-pixel sample of any color showing on my screen. I sampled the Object Color, so that the two would match perfectly.

Finally, I clicked on the Highlight Color sample. I wanted a slightly different color in the highlights, so I repeated the trick with the eyedropper to match the Object Color, and then used the sliders in my Color Picker to change the hue angle to 10°.

Surface Material Dialog, Iris material.
Now, without closing this dialog box, go back to the Material popup and choose Irises.

Here I wanted some of the texture of an iris to show; so I left the texture map that was already loaded. Then I repeated the process used above to choose colors for the other channels. In this case, I chose the same values above, so that the irises would glow with the same color as the pupil, but show the texture map. (It also lets you see how much leaving the texture map limits the glow.)

I left the highlight as black, because I didn't want much highlight on the irises.

Surface Material Dialog, Eyewhites material.
Finally, I went back to the Materials popup menu, and chose Eyewhites.

I left the Texture Map, Object Color, and Highlight Color where they were, and only changed the Ambient Color. I set it for the very same values as I used for the pupils and irises (358° and 100% saturation) but only used 9% lightness. This gave me a slight glow in the eyewhite, but not enough to overpower the irises.

I also set the Ambient Color of the teeth a little higher than usual, so that they would appear to phosphorese. I left the Object Color and Hightlight Color as white, but set the Ambient Color to 0% saturation and 27% lightness.

Then I arranged the lights in the scene to cast the eyes into shadow, and rendered the picuture!

Vampire Vickie in the Dark, bright eyes.Vampire Vickie in the Light, eyes not as striking.
Note that the lighting makes all of the difference. When the eyes are not in shadow, the glow will not be nearly as apparent. In the two examples above, the only thing that I changed was the scene lighting. All the other values are exactly as I have shown you above.

But the eyes, while they are glowing, aren't nearly as striking.

What kind of effect you want is up to you, of course. But remember that anything that is glowing will appear brighter in the dark. (Just like in real life! <g>)

Alien with green glowing eyes.
Of course, not everything that glows needs to be this complicated. And any colors may be used.

In this case, I made Zygote's Alien Grey have green glowing eyes, using exactly the same techniques outlined above for the pupils, but using green, not red.

Girl with a glowing white Rose.
Not everything even has to be spooky. In this case, I made the rose glow using the technique I used for the irises above. Then I put a light on Victoria's face using a spotlight. Once again, a completely undoctored Poser print.

(The model is Zygote's Victoria, wearing the dress from her first Clothing Pack. Both are available from DAZ.. The texture map used on Victoria and the rosebud are both mine, available for downloading right here. The hair is Jim Burton's Strip Hair, available from Renderosity . (Go to Poser Free Stuff, and search for "Strip Hair." It was made for Posette, and I'm using it on Vickie, so it doesn't quite fit. But I still like it, and it's easy to retouch. I just can't bring myself to use Posette now that I've found Vickie! <g>)

That's it! Now you can have glowing stuff all over. Try using glow with transparency, to make ghosts. Or with reflections, or anything else that you can dream up. Remember, being able to create anything that you can dream is what this is all about!

By the way, you can click on any of these pictures to bring up a larger one, that makes it easier to see the details.

If you have a question, write to me and ask it!

Everything on this site is copyright © Robin Wood; all rights reserved. Please do not use anything without permission. To get permission, write to Robin, and explain what you intend to use it for.