Moving Poser Figures into Bryce with a minimum of effort.

This tutorial is based on Poser 4 and Bryce 4. Although the basic principles are the same, there may be easier ways to do this with more modern versions of the programs. However, in case you are still using the older programs, here you go.

Figure posed exactly as you want it.
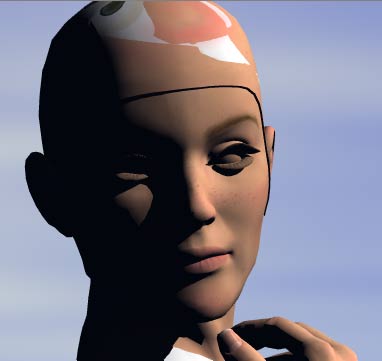
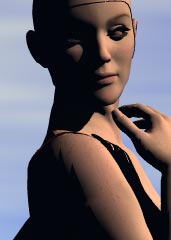
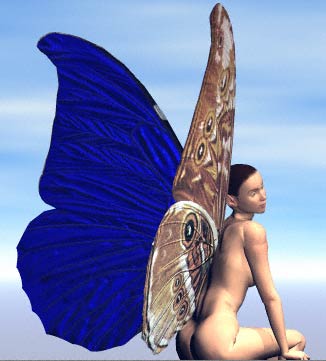
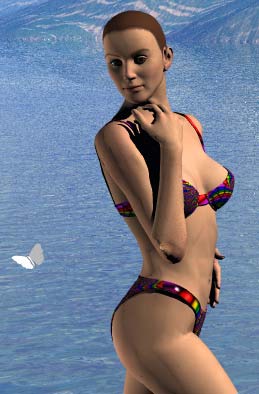
First, arrange your figure in Poser exactly as you want it. (There's no changing the Pose once you get into Bryce.) Keep track of all the textures you use, and where they are on your drives. You will need that information later.

Name the figures, to make it easier to find the parts in Bryce.
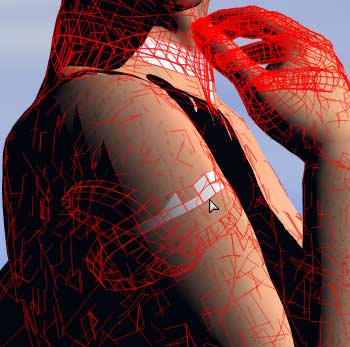
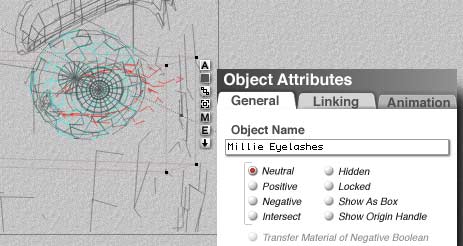
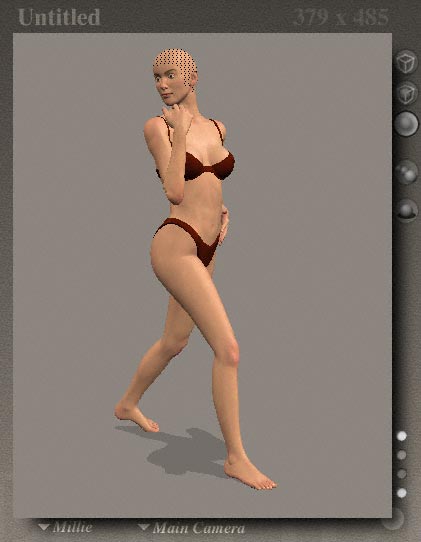
If you have more than one figure in your scene (including conformable clothing) name the figures. Choose the figure, choose Body. Then go to the Object menu, and choose Properties. Type a name into the dialog box that appears, and click OK.

Choose materials in Poser, where there are fewer parts to select.
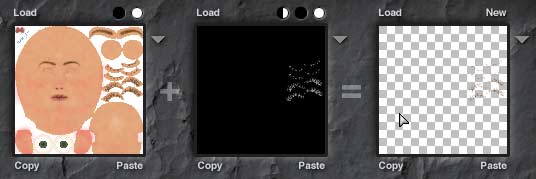
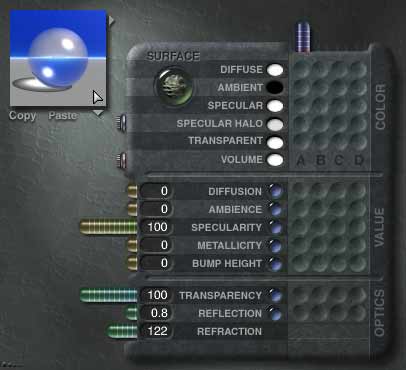
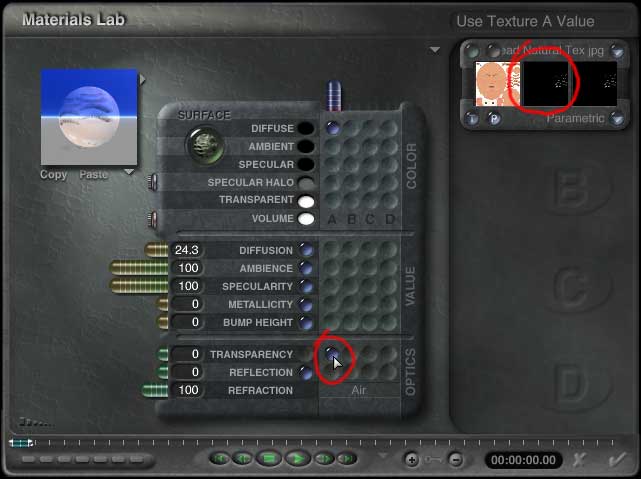
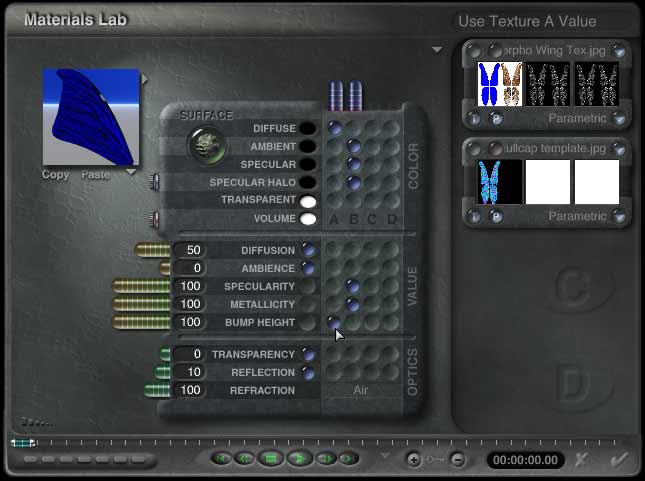
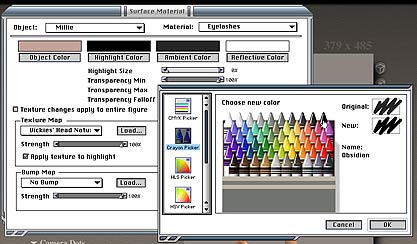
Also at this stage, make sure that all of the materials are the way you will want them in Bryce (not Poser.) Pay special attention to things like the Object color, Highlight Color, Ambient Color, Reflective Color and Highlight Size. (Don't worry about Transparency, it won't carry over anyway.) This is because it's much easier to select and change these attributes in Poser than it is in Bryce. Careful attention here will save you lots of time there. To change these attributes, go to the Render Menu, and choose Materials... Then click on the color squares to bring up the color chooser for your computer system. Choose a color, and click OK.

Select the things you want to export in the Export Wavefront .obj dialog.
When everything is perfect, it's time to export your figure(s.) From the File menu, choose Export and from the popup choose Wavefront OBJ... This is very important, since exporting in .obj format is what allows you to keep the UV coordinates that let you use the maps and things. A dialog box will appear. Click on Single Frame. The Hierarchy Selection Box will show up. Uncheck Universe. Then check the names of all of the figures you want to export, making sure that any props are also checked. When you are sure that you have everything, click on OK. If you realize that you have forgotten to name something, click on Cancel, and name it now. Then come back and repeat this step. After you click OK, you will be asked to choose a place to save the obj file. Choose one.

Export using body part names, figure names, and groups.
A final dialog box will appear. Make sure that "Include body part names in polygon group" is checked. Do Not check "exact internal names." (If you do, Bryce will name the meshes things like Abdomen:3_1. If you leave this box unchecked, it will name them things like Bikini_Top abdomen:3_1, which is longer, but I think it makes things easier to find.) Check "Include figure names in polygon groups" and "Include existing groups in polygon groups." Leave both of the final options unchecked. Click OK, and your figure will be exported. Now you can Quit Poser and Open Bryce. (Unless you have room to run them both, of course. Then it's up to you! <g>)

Prepare to preload your image maps, so Bryce can find them.
Open a new document in Bryce. Don't open the one you want the figure in, even if it's all ready to go. Things will go more quickly and be less confusing if you do the following steps in an otherwise empty document. The size of this document doesn't matter. It's just for prepping the figure.

Bryce is a great program, but it will never go out looking for image maps. So, unless you want to have to select every bit of your models and put the maps on them, they need to be in Bryce already. This is how we do that.

At the top of the window is the Create Palette. Toward the right hand side is an icon which is used to create picture objects. It looks like Leonardo DaVinci's dude with two arms and two legs. (It's name is Leo, by the way.) Click on Leo. This opens the Pictures Library.

Load the image maps into unused slots to preserve their names.
There are lots of empty boxes to put texture maps in. Ignore the first box, which has Leo in it. This is important. If you just click on Load and replace Leo with your first texture, Bryce will call that texture Leo, and won't apply it to your model (unless one of the textures you want happens to be called Leo, that is.) Instead, click on the first blank box. A dialog will open that allows you to browse your drive and find a texture. Locate the first texture you used, and open it to load it into Bryce. Click on the second box to load your second texture, and so on until all the texture maps used in your figure have been loaded. The name of each map will appear in the bottom left hand corner after you load it.

Load bump maps into the middle thumbnail.
If your figure has bump maps or transparency maps, you will need to load them into the second box, which holds the alpha channel. Just load the primary texture map using the method explained above. (If you have both transparency maps and bump maps for the same texture, I suggest that you load the Trans map into the main box as if it were a texture map. Then load it again as shown here. Bump maps need to be in gray scale, by the way. The maps used inside of Poser cannot be read by Bryce.) Click the word Load above the middle box, and a dialog will appear that allows you to browse your drive. Locate, select, and open the Transparency map you need to load it into the Library.

Load transparency maps into the middle thumbnail, too. (You'll need more than one map if you want to use both.)
As soon as the transparency is properly loaded, the final box will show it applied to the map. In the case of eyelashes, this will make it seem that all the rest of the face is gone. Don't let it alarm you; you control the alpha, and you don't have to apply the transparency unless you want it. If you click the little half white/half black disk it will invert your map and make it seem that you have your picture back. But don't do it. If you do, the eyelashes will be little open slots in a solid piece, not little hairs. And that probably isn't the effect you have in mind. <g> When all the textures, bump maps, and transparency maps are loaded, look at the bottom of the palette. Click on "Save List" to open a dialog box and save your list. I usually save it with the same name as the scene I'm working on, so I can find it easily.

When your maps are all loaded and saved, click on the check mark in the lower right hand corner to exit Picture Library. Now click on the check mark again to exit the Materials Lab.

You will find that a square with the last map you loaded has been created in the middle of your Bryce space. Delete the square; you don't need it.

Now go to the File menu, and choose Import Object. Locate and open your .obj file, and Bryce will import it.

Maps loaded, but no transparency at all.
If you did everything right, your model will import with all the shading and texture maps intact. This is because while it was exporting your .obj file, Poser also exported and saved a .mat file, and since the materials were loaded, Bryce could actually read it!

But none of the transparencies will be transparent. Which is not a big problem, since it's fairly easy to fix.

Some parts used to help clothing conform may need to be deleted.
Depending on the clothing and other props you used, there may also be other artifacts which were transparent in Poser, but aren't in Bryce. For instance, in this picture there are white strips left over from the Bikini. (I think they are used to make it conform; but we don't need them any more.) These, too, are easy to fix; we just need to delete them.

Select the meshes from the palette, so you won't accidentally move them.
You could always ungroup your figure and click on the meshes to select them, but I would rather not do that. If you slide the mouse at all while clicking, things will move. And unless you catch them before you do anything else, they are hard to fix. I find it much easier to simply leave everything grouped, and select the meshes I need without touching them!

At the bottom of the Bryce window you will find the Selection Palette. There is a little Flippy Triangle there, next to the tri-colored Family Selection square. Click on it, and choose "Select Meshes" from the popup list. A loooongg list will appear, with the name of every mesh in your picture. (Which is why it's best to do this in an empty picture! <g>) It looks daunting; but the names in it should all be somewhat meaningful.

(If you aren't seeing the palette above, you are probably looking at the Time Palette. Click on the toggle at the far right (circled in green in the picture) to switch palettes.)

Make sure you have the proper part of the mesh, and delete.
Since I want to get rid of the unsightly white strips first, I'll just choose everything that's a part of the bikini that doesn't sound like a part a bikini usually has (like Bikini_Top neck:3_1) Selecting the name puts a check mark next to it, and selects the mesh on the figure. All I have to do is make sure the mesh is the one I want and hit the delete key, and that part vanishes forever!

Figure without white strips.
Do this for all the parts that need to be eliminated. And presto! All the ugly white strips are gone.

Assigning a color family, to make meshes easier to reselect for tweaking.
Now for the transparency. Lets start by clearing up her eyes. You could simply remove this part of her eyeball, as you did the unwanted parts of her bikini. But the reflections and shape would not be as realistic, and it's easy to make it transparent.

Start by selecting the meshes for the eyeballs. The parts you are looking for are usually called rightEye:1_1 and leftEye:1_1. If you have more than one figure, the first number will be different; it's the number for the figure. But the second is usually 1, because it's the first mesh used in the eye. (If that doesn't do it when you start to select things, just keep selecting eye meshes until you hit the right one.)

Once you have them selected, you might want to change the color family so that if you have to select them again it's simple to do. Just click the color box under the A, and a palette with several rows of colors will open. Choose a color that isn't used anywhere else. You will probably find it easier to use if you name it, too. There is a space for that at the bottom of the palette. I usually call it something like Cornea. Then, if you decide that you want more (or less) reflection on the eyes, you can just click on the tricolor square in the Selection Palette, and choose everything in the color family "Cornea" to select them. Click on the check mark to close the palette.

Creating a Cornea material.
Click on the M below the color family box to enter the Materials Lab, and make a material that suits you, with lots of transparency and some reflections. Don't forget to add some refraction. When you think you have it right, click on the check to exit the Lab. Don't fret too much over this; you can always change it later. That's why you put the eyeballs in their own color family!

Clear eyes, solid eyelashes.
And that takes care of the film over her eyes. But her eyelashes are still a solid piece.

Naming meshes to make them easier to reselect.
To fix them, you first need to select them. Go back to Select Meshes, and locate them. They will be part of the Head meshes. (For Zygote's Victoria, for example, they are head:1_5) Once you have them, you may want to click on the A. This opens the Object Attributes dialog. From there, you can name them something that's a little easier to find in case you need them again, like "Eyelashes."

Setting transparency to the correct map.
Click on the M to enter the Materials Lab again.

In the materials lab is a table with three sections and lots of little dimples. The first sections are labeled Color and Value.

The third section of the Material Table is labeled Optics. The first property in this section is Transparency. Click in the dimple that corresponds to the correct texture map (A,B,C or D. The one you want is the one with the trans map you need showing in the middle section. Which one that is depends on how you loaded them. If your trans map is not showing, and you need the textures that are, click in the next unused dimple, and follow the instructions above to go to the Picture Library and choose the correct map. If you don't need one of the textures, enter the Picture Library from that texture and select the Trans Map you need.)

Don't move the slider at this point, just click.

Setting "Blend Transparency" to make the non-transparent part invisible.
Now look above and to the right of the table. There is a flippy triangle there, which hides the menu used to set the Material Shading Mode. Click on it. Choose "Blend Transparency" from the popup menu. The transparent parts of the preview sphere should vanish. Click on the check mark to exit the lab.

Eyelashes!
And there you are! Eyelashes!

Repeat this process for everything that has a trans map.

Setting individual bump maps.
For bump maps, you will need to repeat much of the same process, choosing the correct dimple for the appropriate texture (but for Bump Height in the Value section, of course.) There you will also need to determine how high (or low) you want the bump to be. That is done by moving the slider, or by clicking on the number and typing a value into the box.

While doing this, it's usually easier to see what, exactly, is happening if you choose to preview the actual selection. Choose your preview by clicking on the flippy triangle under the preview window. Zoom in on your object by holding down the Command/Control key and dragging your mouse. Move around it by holding down the shift key and dragging. Change the position of the preview in the window by holding down the space bar while you drag. Return to the default by tapping the option key.

You can also get interesting effects by using other maps in the other channels, as I have here.

Bump showing on a fairy's wings.
Don't be afraid to play around. One of the real beauties of the computer is that you cannot overwork and ruin your pieces. You can always go back to where you were. (And it's easier if you save often, and use sequential names if you are about to strike out in a new and unexplored direction!)

Select the figure group, copy, and paste it into your scene.
When you have everything set, save the prep scene one last time. (You have been saving all along, haven't you?) Then select the group. (Don't forget to name it using the Attributes Dialog under the A if you are going to be bringing it into a scene with other groups.) Now copy.

Open the scene you have prepared for it, and paste it in. (It's easier to make most of the scene separately, unless you have a really fast computer.) Size and arrange the figure, and tweak the scene as needed to get just the effect you want. And Ta-Da! There you are!

Entering the Texture Source Editor to add more maps.
If you decide at any point that you want to add a texture map to something that was without one, you can do that. Just select the mesh (or group of meshes) you want to add the map to. Then click on the M to enter the Materials Lab.

Once there, go to the Texture Component Window, and click on the Pink Dot in the left hand corner. This will open the Picture Library, which you are already familiar with. Simply load the maps you want, as you did in the beginning. Choose the one you want to apply by clicking on it.

Bikini with texture map.
Assuming the UV mapping on the meshes is correct, you will have a nicely mapped part, exactly as if you had imported it like that.

Bikini with procedural material.
Don't forget that you can also use the procedural textures to get interesting effects, as I did on Millie's Bikini here, even if the UV mapping is lacking.

To change a picture texture to a procedural texture, click on the button labeled T in the far left bottom corner of the Texture Component Window. Bryce will generate a random procedural texture. You can change it however you like. Check your Bryce User's Manual for more instructions about that. (And don't forget, if you want to assign another texture from the Texture List, hold down the shift key while you click the blue Flippy Triangle on the upper right corner to open a visual palette, instead of just getting a text list.)

That's it! This technique works with all kinds of figures and props, and anything else that has .obj UV mapped texture coordinates; so enjoy yourself, and write if you get work! <g>

If you have a question, write to me and ask it!

Everything on this site is copyright © Robin Wood; all rights reserved. Please do not use anything without permission. To get permission, write to Robin, and explain what you intend to use it for.