Compositing Pictures onto a Background in Poser
Part 2

This is the second part, for the more advanced user. If you haven't read part one of this tutorial, please do so before reading this part.

OK, so you know what to do when you only have one horizon line to deal with, and you know about adjusting the focal length.

But what if you just can't get it?

Well, sometimes you can't. That's because photographers often crop their photos, and use cameras that are much more sophisticated than the one inside Poser and so on.

So, in those cases, do the best job you can; but don't make yourself nuts.

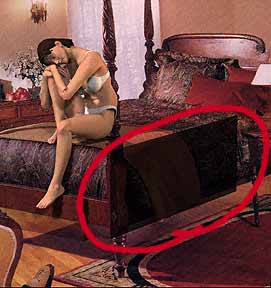
The most important planes to match are the ones that the shadow will actually be lying on. In this example, I could match the top of the bed, and sides pretty well. But the line of the bedpost isn't exact. I'll just have to live with it. The finished piece won't show that line anyway.

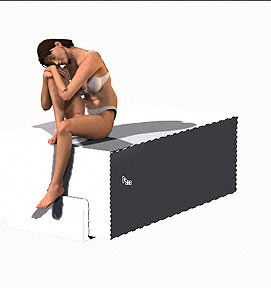
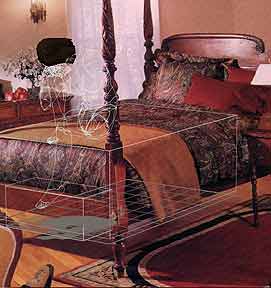
Notice that since the figure is sitting on an object, I've used cubes to represent those objects and take the cast shadows. That's how that bit is done! <g>
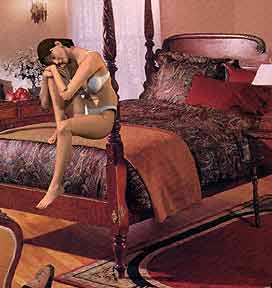
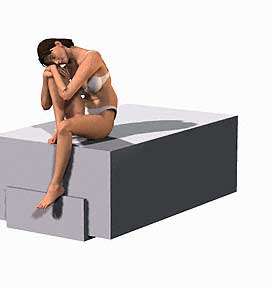
Render of model on bed, without shadows. Don't forget to use all the light sources, and scale your model appropriately. This is the rendering with the model in place, but no shadows.

It's ready for the shadows to be dragged onto it.

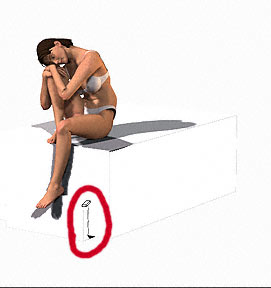
Setting up cubes to catch the shadows. Match the underlying shapes as closely as possible. This is the arrangement of cubes for the bedframe. If I was serious about this picture, instead of trying to rush it up here for the tutorial, I would have put in a ground plane and made sure the end of the "bed" was the same size as the one in the photograph.

In that case, I'd have rendered the ground plane as well, to catch the shadow of her toes.

Since I wasn't doing that, I didn't render the ground plane, since it would simply have gotten an extra shadow on it.

But I'm sure you can extrapolate from here, and add things like columns for trees, etc. Also, don't forget to have something to cast any shadows that will land on your figure. If there are other people in the photo, I'm afraid that you will have to pose them, etc.

That part can get complex, and if you can't make props you may want to avoid pictures that require it.

Extraneous shadows from the cubes need to be removed. Now the problem with this, of course, is that after the images are multiplied, and the mask is in place, there are still artifacts left from the dark side of the box, etc.

Those will have to be removed.

Select shadow areas with the Magic Wand tool, and delete them. Hold down the option/alt key, and click on the little icon of an eye next to the name of the shadow layer in the Layer Palette.

This will isolate that layer, and let you work on it without being able to see the others.

Select the Magic Wand tool, and click on the sections of shadow that you don't want. Once they are selected, delete them.

You can also add those sections to the mask by clicking on the mask icon in the palette (the mostly white thumbnail) and then filling the selection with black. You might want to do this if the masking is tricky, and you want to be able to get the shadow back in fussy little areas. Otherwise, since you have to select from the painting, not the mask, it's a lot of clicking back and forth for no real reason.

Erase any unwanted shadows. You may also want to touch up the edges with the eraser tool to make sure all the bits are gone.

When you are finished, you should have nothing on that layer except the shadows themselves.

When you are deleting things, remember to use the delete key; don't fill the area with white. That may create a white halo on the image.

I'm not showing the checkerboard pattern for transparency in this illustration, because I find it difficult to see where I still need to clean up when it's there. To get rid of it, go to the Preferences in the File menu, and choose Transparency and Gamut. In the Transparency Settings section, where it says Grid Size choose None from the menu.

Mask foreground by revealing objects, then working background back in around them. In the step where you mask out the figure to reveal things in front of it, you may have quite a large or complex thing to reveal.

In that case, I find it easiest to use a broad brush with the black paint, and make the entire edge just go away.

Then I can see what I'm doing when I go in with a smaller brush and white paint, and put the picture back.

That's the beauty of masks, and why this step uses one, instead of using the eraser! <g>

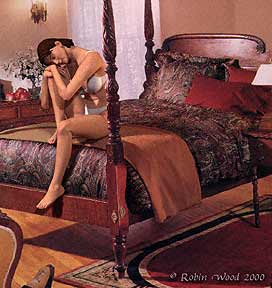
Finished picture. Just in case you wanted to see the finished picture after coming this far, here it is.

I haven't retouched her hair yet, or any of that stuff.

But I did add a color cast to make her fit in a bit better. It's easy enough to do. Just load that Alpha 1 mask again, and change the color balance using the Image- Adjust- Color Balance dialog box. (Or hit command/control B to bring the box up.) Then slide those sliders until the colors look perfect! <g>

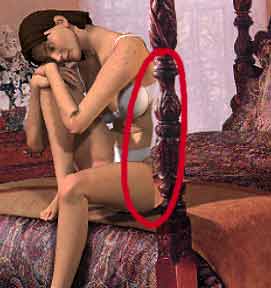
I also pulled the shadow on the bed a bit to match the bedpost. One of the things they don't have in Poser is bulb lights! Which is one of the reasons I seldom do my renderings there, myself.

Hope this was helpful!

If you have a question, write to me and ask it!

Everything on this site is copyright © Robin Wood; all rights reserved. Please do not use anything without permission. To get permission, write to Robin, and explain what you intend to use it for.