Modeling a Threaded Screw in Lightwave
This tutorial will show you one method of putting threads on a screw. Lightwave is very rich, and there are many ways to do just about anything you want to do. This method uses the Lathe tool, and is most convenient I've found so far.
Click on any of the pictures to see a screen capture of the whole screen.
Modeling the Screw Base.
(If you know basic modeling, you can skip ahead to Adding the Threads.)
 |
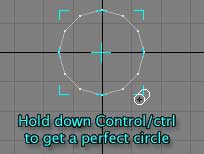
In the viewport that shows the Top view, create a disk, holding down the Control/ctrl key to make it symmetrical. When it's the size that you want, tap the spacebar to drop the tool. It should be two-dimensional; we'll be adding depth in the next step.
Center it by tapping F2.
|
 |
Select the poly you just made by clicking on it, and copy it by tapping Command+C on a Mac or ctrl+C on a PC.
From the Multiply tab, choose the Bevel tool.
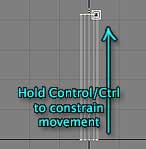
Go to the Back view, hold down Control/ctrl to constrain movement, and drag up to make the shank of the screw. Click the right mouse button (or Command+Click if you have a one-button mouse) to accept the bevel.
|
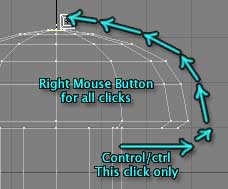 |
Hold down Control/ctrl again, and drag to the right to form the base of the screw head.
Right click to accept it, and form the screw head by dragging up to increase the height (shift,) and right to increase the width (Inset.)
Remember to right-click between each new bevel to accept it. When you are finished, and have made the last section, tap the space bar to drop the tool.
Then click in the blank area of the toolbar to drop the selection.
|
 |
Paste the poly you copied earlier by tapping Command+v/ctrl+v, and make sure it's selected. (You may have to select it by tapping the area where it should be in the perspective view. You won't see it, because it's facing the wrong way, but it should be there.)
Flip it by tapping the f key, so the poly is facing down.
|
 |
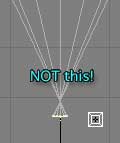 |
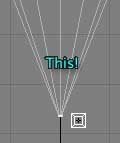
Tap b to get the Bevel tool again, and drag up and to the left to form the point of the screw. Yeah, that seems backwards; but dragging up always increases the Shift, and left decreases the Inset. Since the poly is facing down, increasing the Shift moves the beveled surface down, too.
If it's too much for you to deal with, click in the empty area below the tools to drop the new bevel before it's accepted, tap f to flip the poly back up, and drag down and to the left. You will have to select the new polys and flip them all, though.
In any case, make sure you leave a tiny poly at the bottom of the screw. You don't want the vertices to pass through each other, and make a weird, non-planer mess.
|
 |
When you are happy with it, drop the poly and tap m to Merge the Points from the shank and the tapered point of the screw. (You need to do this, because you pasted the poly you beveled. Anything you paste is a separate part, and needs to be merged if you want it to become part of the whole.)
|
 |
To make the slot for the top of the screw, we need a new layer.
Click the second Layer Icon at the top of the window to choose the next layer as the foreground.
Click the bottom half of the first Layer Icon to use Layer 1 as the background. That will let us see a black outline of the screw, so we can make the slot to fit.
|
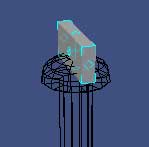 |
Create a box, wide enough to be the slot you need, with the bottom edge where you want the opening to land, and the top well above the top of the screw head.
Make sure it's centered by using the Numeric Requester (n) and entering 0 (zero) for the Center X and Center Z values. Tap the Enter key to accept the values after you type them.
|
 |
Tap the ' (single apostrophe) key to swap layers.
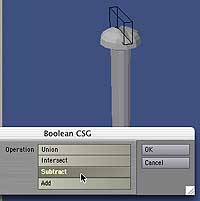
Tap B (shift+b) to get the Boolean tool. This will call up the Boolean Requester.
Choose Subtract, because you want to take the shape in the background away from the shape in the foreground, and there you go; a neatly cut slot for your screwdriver.
This is a separate piece, too; but don't merge these points. Leaving them separate will give you a sharper edge on the groove, whether you are using smoothing on the surface, or SubPatches.
|
Adding the Threads.
 |
To make the threads, tap the ' key again, to swap layers, so the box is in the foreground, and the screw is in the background. Delete the box.
Tap the + (plus) key to get the Create Points tool.
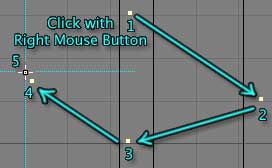
Think about the cross-section of the threads. This is the shape you'll need to create in this step. To form a sharp edge, put two points near each other. (The closer they are, the sharper the point as SubPatches.) Put one point in the middle, so you can easily select and delete the inside polys a few steps from now, for very cheap sharp edges. I'm making a simple sharp thread, but yours may need a different shape, depending on what the threads look like.
Click clockwise to put a point at each corner of the thread cross-section you have visualized, using the right mouse button to accept the points as you make them.
|
 |
When you are happy with the shape, tap p to make the points into a polygon. (Creating or choosing points clockwise makes a poly that is facing you. Clicking counter-clockwise makes one that faces away from you.)
Tap t to get the Move tool, hold down Control/ctrl to constrain movement, and drag the poly to the top of the screw, if you didn't create it there.
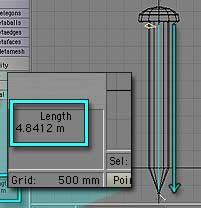
Go to Construct > Utility > Measure (Control+Shift+q) and get the Measure tool. Click on the poly, and then drag to the bottom of the screw where you want the threads to stop. Make a note of the measurement. (4.8 m in this case.) Tap the spacebar to drop the tool.
|
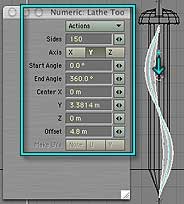 |
Get the Lathe tool by tapping L (shift+l.) In the Back or Side viewport, click in the middle of the screw, and drag down slightly to create a lathe shape using the Y axis.
Move to the Numeric Requester (tap n to open it if you need to) and type 150 into the Sides field. Since we're going to make a long screw, you're going to need a lot of sides to keep the shape from distorting.
Tap the Enter key to move through the Start Angle and End Angle fields. We're going to adjust them interactively.
Type 0 (zero) into the Center X field, tap Enter to move through the Y field, and type 0 (zero) into the Center Z field. That will exactly center the lathe on the X and Z axes. Since the screw is already centered, this means that the threads will be perfectly centered on the screw.
Type the number from the step above into the Offset field of the requester, and tap the Enter key one more time to accept the value. You will have one long thread going from the top to the bottom. (If you dragged up, not down, your thread will go up beyond the top of the screw. If this happens to you, click in the empty area under the tools to drop the lathe, and click and drag down. Some of the things you entered in the Numeric Requester will probably need to be re-entered.)
|
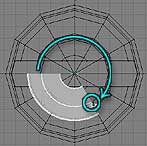 |
Move to the Top viewport, grab the handle (it looks like a tiny cyan line, perpendicular to the circle of the lathe,) and start swinging it around clockwise. If you have the correct handle, you will be unmaking the lathe, and then remaking it in the opposite direction. (The Start Angle in the Requester should remain at 0, while the End Angle moves into negative numbers.)
|
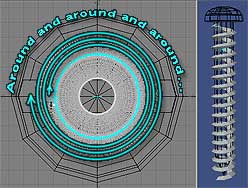 |
Keep twisting clockwise until it looks like you have enough threads. If they begin to become distorted, increase the number of Sides.
We do it this way to make sure the threads go around the screw in the correct direction. If the lathe goes the other way, you'll have the dreaded Left Handed Screw, which tightens the wrong way, and will confuse your virtual engineers and handymen. (This method eliminates the need to flip the polys on the thread, too.)
|
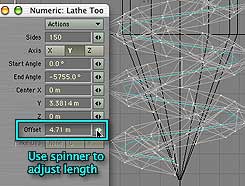 |
Check the bottom, to make sure the threads end where you want them to. Adjust them by dragging the Spinner in the Offset field, if necessary. (Drag right to increase, left to decrease, of course.)
When it's just the way you want it, make sure that you aren't still working in the Requester (hit the Enter key a few times, if you aren't sure, and see if any fields highlight) and tap the spacebar to drop the Lathe tool.
|
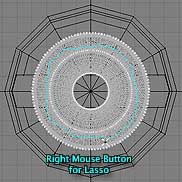 |
Select the polys that are inside the shank, and delete them all. (This is actually easy to do, by using the Lasso tool (right mouse button) or scrubbing the mouse on those inside polys to select them. If you decide to scrub, make sure that you drop the two end polys before you delete. The Lasso won't catch them.)
Remember, we put this inside point on the original poly when we made it so we could eliminate this part, which makes the polys sharper if you use SubPatches or smoothing. (Polys that connect to another poly smooth the edge. Polys that don't connect to anything keep sharp edges.)
|
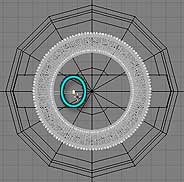 |
Select the inside points of the polys at the beginning and end of the lathe shape (the ones that stick into the center of the threads,) and delete them, so you'll have four point polys for SubPatching.
(When you delete points like this, the polys simply reform without that point.)
|
 |
To make the threads match the screw shape at the bottom, select the Taper 1 (Taper Evenly) tool from the Modify tab.
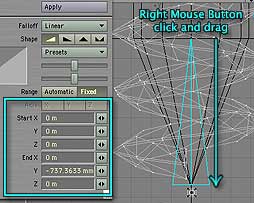
Using the Right Mouse Button, click at the point where the screw begins to taper, and then drag straight down to the bottom of the screw to shape the falloff for the tool. This will cause the tool to taper only the very end, and leave the rest of the threads untouched. (The point of the falloff shape shows the minimum strength, while the flat edge shows where the tool will operate at full strength.)
In the Numeric Requester (n) sure that the Start X and Z and End X and Z values are set to zero. This ensures that the falloff is exactly centered.
|
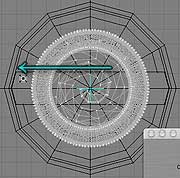 |
Make sure that you are using Action Center: Selection mode. (Choose it from the Modes menu at the bottom of the screen.) That will keep the taper from being lopsided.
Using the viewport that shows the model from the Top, drag left to taper the bottom of the threads towards the center. (As always, left decreases, right increases.) You'll see the taper in the windows; stop when it's far enough.
|
Using SubPatches on the Model (If you don't want SubPatches, skip ahead to Finishing Up!)
 |
To use SubPatches on the threads, just tap the Tab key. Tap it again to toggle back to no SubPatches. SubPatches are smoother, but they do take longer to render, and longer to move around in the viewports.
|
 |
If you want to use SubPatches for the screw body, put Layer 1 in the foreground by clicking on its layer icon at the top of the screen. (You don't need anything in the background.)
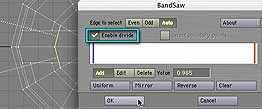
Select a couple of polys from the screw shank, and then go to Construct > Bandsaw.
In the BandSaw Requester that appears, click to Enable divide. Then click on Edit and drag the colored division line to the end of the white window. Click on the Add button, and click in the white window to add another division at the other end, so you will be breaking the poly at the top and the bottom, to create sharp edges. Click OK to accept those values.
|
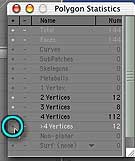 |
Select all the polys that have more than 4 vertices by clicking on the + sign next to the >4 Vertices line in the Polygon Statistics window. (Tap w to open it, if you can't see it. If it says Point Statistics at the top, switch to Polygons by tapping F4 or the Spacebar, or by clicking the Polygons button at the bottom of the screen.)
|
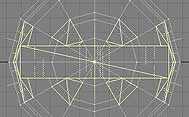 |
Triple them by tapping T (shift+t) on your keyboard, which splits them into a bunch of 3 sided polys. We need to do this, because Lightwave will only make SubPatches from polys with 3 or 4 sides (tris and quads.)
Tap the Tab key to make SubPatches.
If you don't want to use SubPatches, then skip these steps, of course.
|
Finishing Up!
 |
Cut everything from the Thread layer, make Layer 1 the foreground layer and paste to thread your screw.
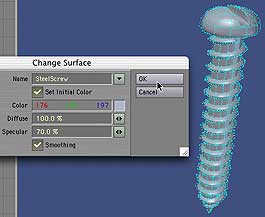
Tap q to open the Change Surface Requester, choose (or make) a surface for your screw, and you are done!
Of course, this same method, with only slight variations, will work for anything you need continuous threads on. Play with it, and have fun!
|
If you have a question, write to me and ask it!
If this tutorial has come lose from the frame it's supposed to be in, or is in someone else's frame, just click here to fix that. (You may need to select the
Threading a Screw
tutorial after clicking.)
Everything on this site is copyright © Robin Wood; all rights reserved. Please do not use anything without permission. To get permission, write to Robin, and explain what you intend to use it for.
