 |
 |
|
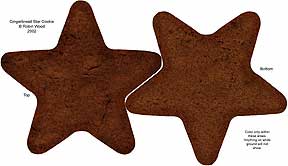
| Light Color Maps and Bump Maps Download .sit 3.2 MB Download .zip 2.5 MB These are the maps that came with the download from DAZ. The ones here are higher resolution, however, so if you are planning to do closeups, you may want to grab them. Included are the maps for the plates and napkins, and the bump maps for the cookies. They are only in this download. To work with the Poser files, you must put these in a directory (folder) called ChristmasCookiesTex inside a directory called RobinWoodTex inside textures inside Runtime inside your Poser directory. That's where Poser will expect to find them, and if they aren't there it won't be able to. |
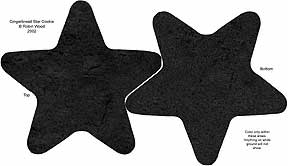
Dark Color Maps Download .sit 1.5 MB Download .zip 1.3 MB Maps for dark gingerbread. The icing colors have also been changed where chocolate icing would not have been visible, of course. |
|
 |
 |
|
| Plain Light Cookies Maps Download .sit 1.3 MB Download .zip 1.0 MB In case you want to decorate your own cookies! There is no package with the mesh maps for the cookies, since these will work just as well, I think. If you disagree, write to me, and I can put another set up. |
Plain Dark Cookies Maps Download .sit 1.3 MB Download .zip 1.1 MB The same thing, but using the dark gingerbread for those who prefer it. |
|
 |
 |
|
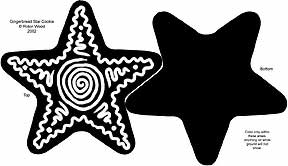
| Plain Cookie Bump Maps Download .sit 1.0 MB Download .zip 872 KB These are the bump maps for the plain cookies. Making bump maps in Photoshop is easy when you use these, and put the icing on a different layer. Then just copy the layer, lock the transparency, and fill with white to get the white center for the icing bump (or the icing specular.) In Photoshop 7, I use a drop shadow with an opacity of 52%, a Distance of 0, Spread of 4 and Size 3 combined with an Inner Glow (Opacity 75, Noise 0, Softer, Choke 0, Size 2, Range 48 and Jitter 21) set to dark gray with a Blend Mode of Multiply to make automatic shadows for the edge of the icing bumps. |
Specular Maps Download .sit 765 KB Download .zip 625 KB You can't use these in Poser; but in case you are planning to export the files, and render the cookies in a different program this will let you have glossy icing, and matte cookies. (Just the way they should be.) I used this to make the cookies in the example on the front page, and for all the icons. (All rendered in Lightwave, by the way.) |
|
 |
 |
|
| Mesh UV Maps Download .sit 1.6 MB Download .zip 1.2 MB These are the maps for the two plates, the glass, and the napkin. I've included them separately because it's harder to tell where the shapes are from the texture maps. (It's pretty obvious with the cookies!) Also, I didn't use a texture map for the glass of milk. But, in case you want to, the UVs are all in place and ready to go; and here is the map of them. |
Finally, if you aren't sure if any of this is something you are interested in, here is a shot of all the cookies that are included in the set, so you can decide before you download.
Click on the picture to see a larger image. |